Mommy Octopus

We can all use a few more hands

  • Giveaways
  • Travel
  • Recipes
  • Disney World Tips
  • Homeschool
  • Law Enforcement Support
  • PR Inquiries
  • Contact Me
  • About Me

Decoupage Fabric Christmas Ornaments!

December 21, 2015 By MommyOctopus Leave a Comment
By clicking my links, I may earn a small commission to support this blog. Please see our Disclosure Policy.

Decoupage Fabric Christmas Ornaments DIY

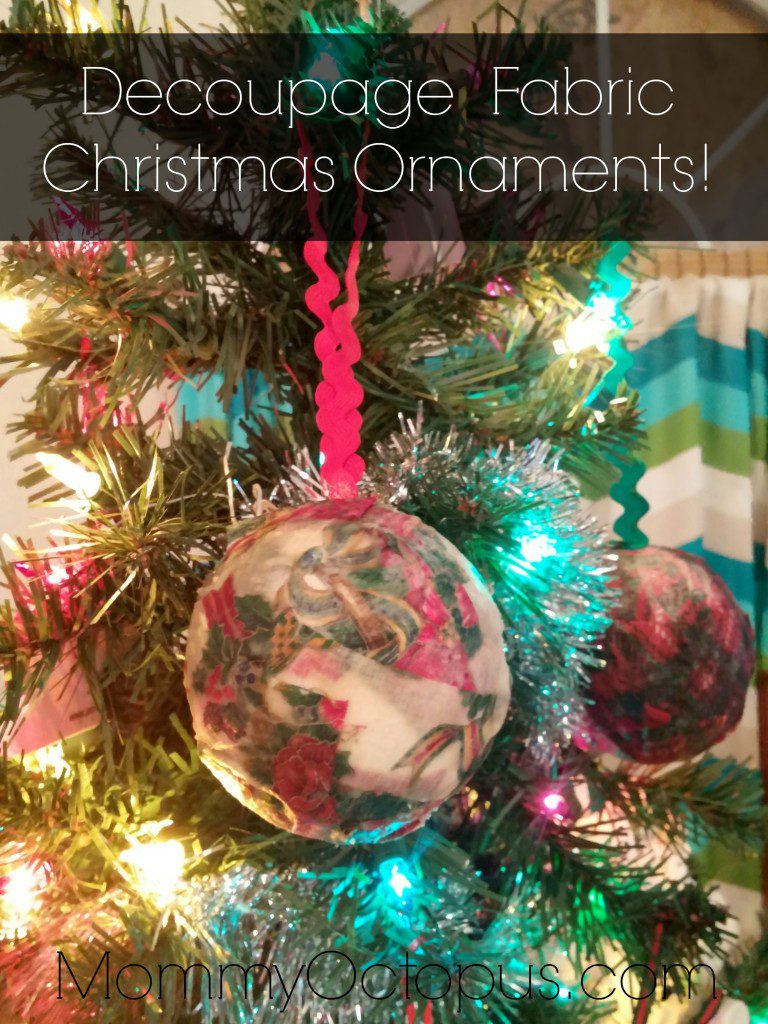
We’ve been busy with the Kids in the Kitchen again with our friends at Dixie Crystals.  This time, we are making the Holiday Fabric Ornaments!  This was a rather simple project with minimal mess and a lovely keepsake for Christmases to come.  The kids really enjoyed making them and are hoping to make a few more as gifts.  Now that we see how simple it is, we can definitely work making more into our busy Christmas week.

Supplies: 

  • Small strips and squares of holiday themed printed material, brown muslin or burlap.
  • 1 1/2 cups flour
  • 1/2 cup Dixie Crystals Extra Fine Granulated Sugar
  • 1 teaspoon oil (grapeseed, olive, etc.)
  • 1 1/2 cups water
  • Styrofoam balls
  • Paint brush
  • Pins
  • Twine or ribbon

Dixie Crystals Decoupage Ornaments

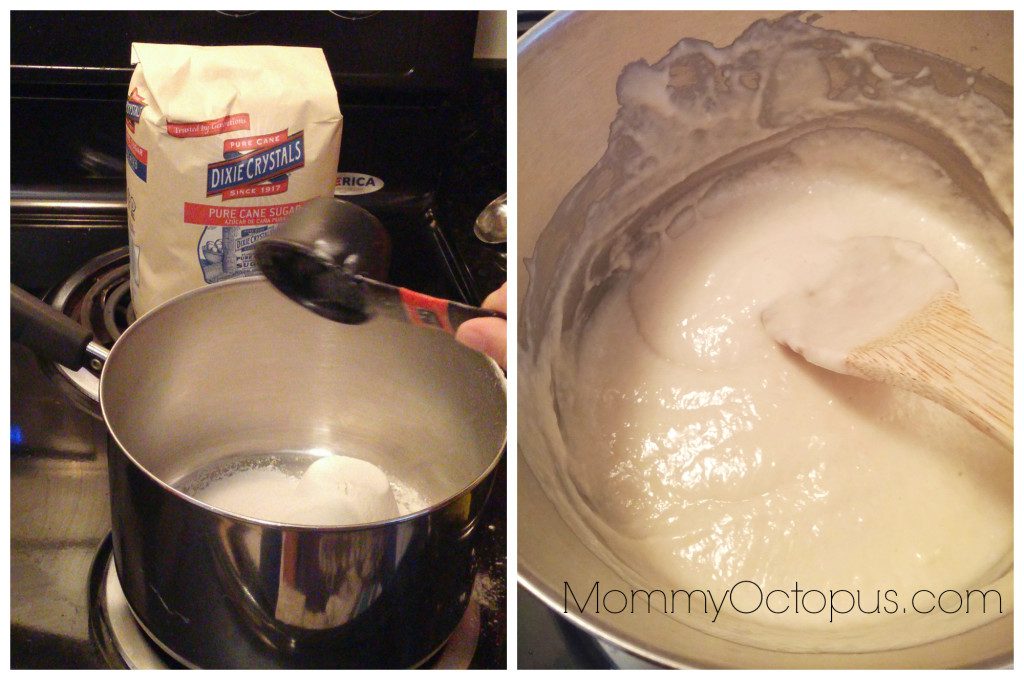
First up, you need to make the decoupage glue. Simply mix flour, sugar, oil and water in a pot over low heat until well combined and smooth in texture to make the decoupage.  I used half of the ingredients listed and we had plenty of glue.

Decoupage Ornaments

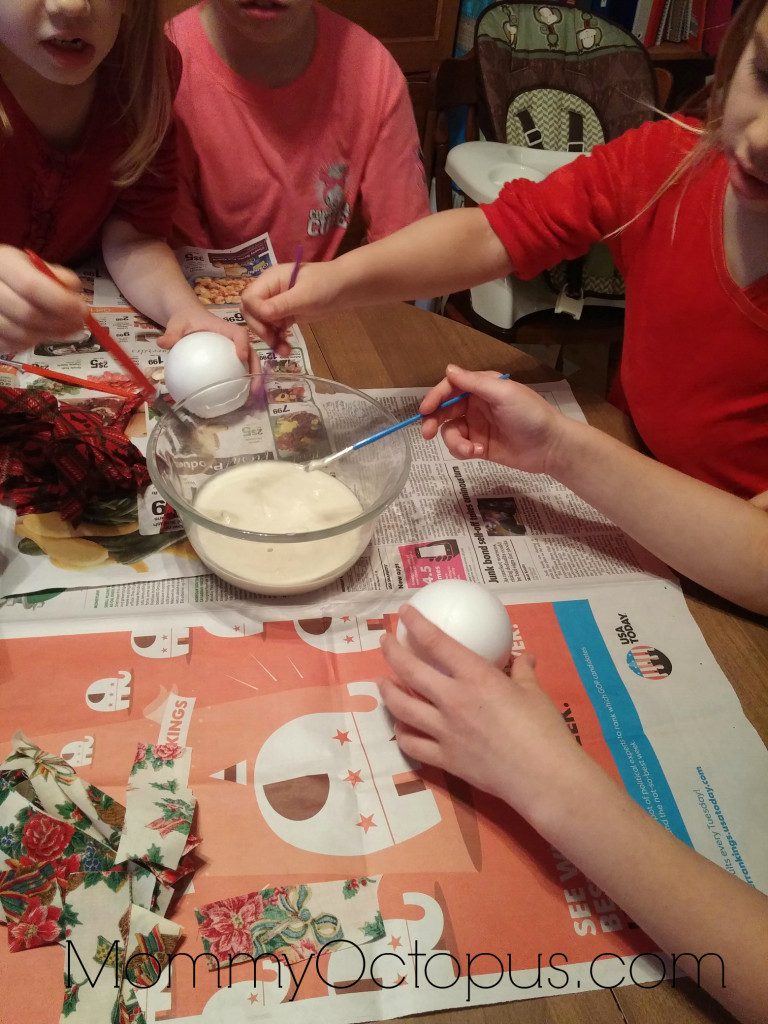
Next, cover your styrofoam ball with a generous amount of decoupage glue.

Decoupage Ornaments for Christmas

Layer the fabric strips however you wish and allow them to overlap each other for maximum coverage.  After each strip, cover it with another layer of decoupage.  My kids found it easiest to have one of them hold the ball while the other layered the strips and glue.  The ball was easier to make when they went hands on and smoothed out all the strips and glue.

Once the styrofoam ball is completely covered, make sure there is a final coat of decoupage glue over the entire ball.

Using a few inches of ribbon and a craft pin, attach the ribbon to the styrofoam ball.  Hang somewhere to dry before adding it to your tree or gifting.  We hung ours on the back of our patio chairs.  It took a few hours to dry and then was tree-ready!

For more fun recipes and activities, visit Kids Kitchen.

Leave a Reply Cancel reply

Your email address will not be published. Required fields are marked *

This site uses Akismet to reduce spam. Learn how your comment data is processed.

Catch up with Mommy Octopus

Follow Me on Pinterest

Subscribe

Enter your email address:

Delivered by FeedBurner

Categories

Timberdoodle"

Grab My Button


Schoolhouse Review Crew

Privacy Policy | Disclosure

Copyright © 2023 · Modern Blogger Pro On Genesis Framework · WordPress · Log in

We are using cookies to give you the best experience on our website.

You can find out more about which cookies we are using or switch them off in settings.

Mommy Octopus
Powered by  GDPR Cookie Compliance
Privacy Overview

This website uses cookies so that we can provide you with the best user experience possible. Cookie information is stored in your browser and performs functions such as recognising you when you return to our website and helping our team to understand which sections of the website you find most interesting and useful.

Strictly Necessary Cookies

Strictly Necessary Cookie should be enabled at all times so that we can save your preferences for cookie settings.

If you disable this cookie, we will not be able to save your preferences. This means that every time you visit this website you will need to enable or disable cookies again.