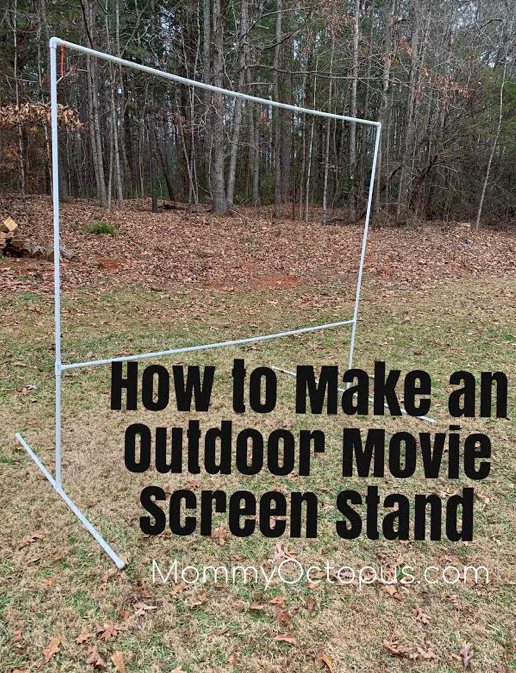
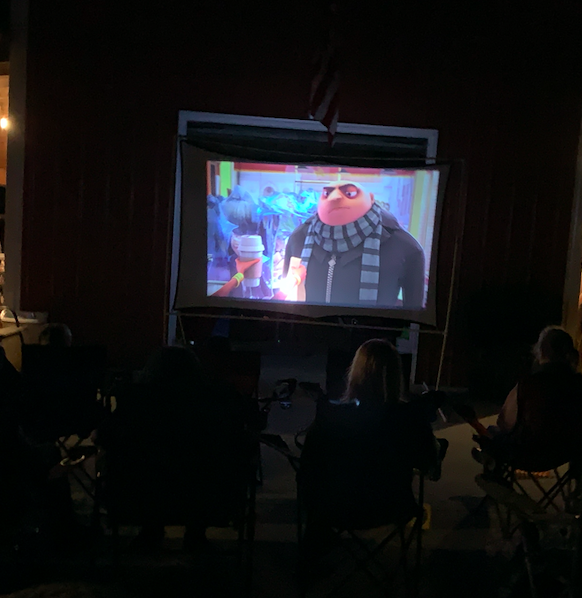
My husband recently built an outdoor movie screen stand for our outdoor projector. Our screen is 100 inches in size. It only took a simple trip to the hardware shop to get ours up and running.
Please read through this completely, along with the notes at the bottom from things we’ve learned along the way.
Supplies:
- 4 – 10 foot PVC Pipes, 1/2 inch diameter
- 4 – T Fittings, 1/2 inch diameter
- 4 – 1/2 inch end caps
- 2 – 90 Degree Angle, 1/2 inch diameter
- 6 – Cup Hooks (depending on your screen) – note: 6 individual ones, not packs.
- Drill
Prep:
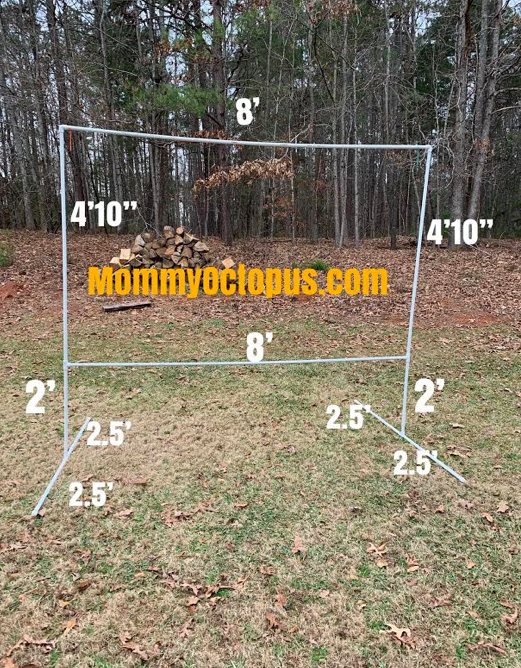
- Cut 2 of the 10′ PVC Pipes into 8′ lengths, saving the 2′ remnants. These 8′ pieces will be the top and bottom of your screen stand.
- Cut 1 of the 10′ PVC Pipes into 2 – 4’10” lengths. You will have 4′ leftover that you do not need. These 2 – 4’10” lengths become the left and ride sides of the screen stand.
- Finally, cut the last 10′ PVC Pipe into 4 – 2.5′ lengths. These will be the feet of the stand
Assembly:
For your first assembly of this outdoor movie screen stand, we recommend using two people until you get the hang of how to assemble the stand.
- Put the 90 degree angles at both ends of an 8′ PVC piece.
- Connect the 4’10” PVC lengths to the 8′ piece using the connected angles.
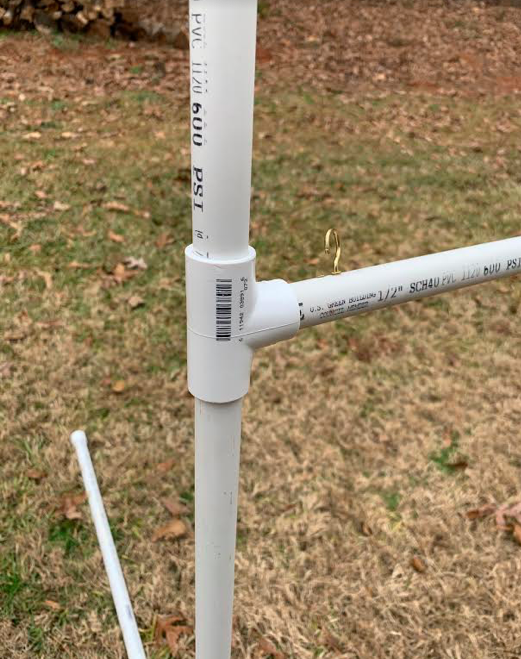
- Use a T fitting on each of the bottoms of the 4’10” inch pieces to connect the remaining 8′ length for the bottom of the screen.
- Next use the remaining 2′ lengths to come down from the screen.
- At the bottom of each of the 2′ length pieces, place another T Fitting.

- Connect the four 2.5′ lengths on each side of the T Fitting on each leg.
- Place end caps on exposed pipe ends.
- Since screens vary, line up your screen grommets with the frame and using a marker, mark where your hooks need to be. Then drill the holes and hand twist the hooks in to secure to the pipe.
Since all pieces are removable, you can collapse this stand easily for storage and reassemble whenever needed. We’ve even taken it to my brother’s house for a movie night.
Notes:
- We color coded our hooks with a colored zip tie since our grommets are not symmetrical on our screen. This helps us put the screen on correct the first time.
- Although we used regular PVC Pipe, in the long term, it may have been better to use the electrical PVC pipe, since it’s a little more sturdy. We’ve had ours for several months and it still works fine, though.
- When it’s windy, you may want to anchor down the stand. Otherwise the screen becomes a sail and the stand and screen could go flying.
- This stand was created to hold a 100 inch screen, provided in the TMY Projector with 100 Inch Screen set we purchased on Amazon. If you have a different size, you can use these instructions as a guide to create your own stand.
Let me know if you have any questions and I’ll do my best to answer them!
Leave a Reply