Mommy Octopus

We can all use a few more hands

  • Giveaways
  • Travel
  • Recipes
  • Disney World Tips
  • Homeschool
  • Law Enforcement Support
  • PR Inquiries
  • Contact Me
  • About Me

Painting with Toddlers WITHOUT the Mess!

May 16, 2017 By MommyOctopus Leave a Comment
By clicking my links, I may earn a small commission to support this blog. Please see our Disclosure Policy.

My youngest is now 20 months old and he always wants to keep up with the big kids.  When they are painting, he wants to jump in as well, however I’m not quite fond of the huge mess that a toddler and paint can bring!  I remembered a trick that I learned when I was teaching preschool before kids on how to paint with a toddler without the mess.  Painting with toddlers doesn’t have to be a disaster!  If you don’t mind a little water, they can have fun, too.

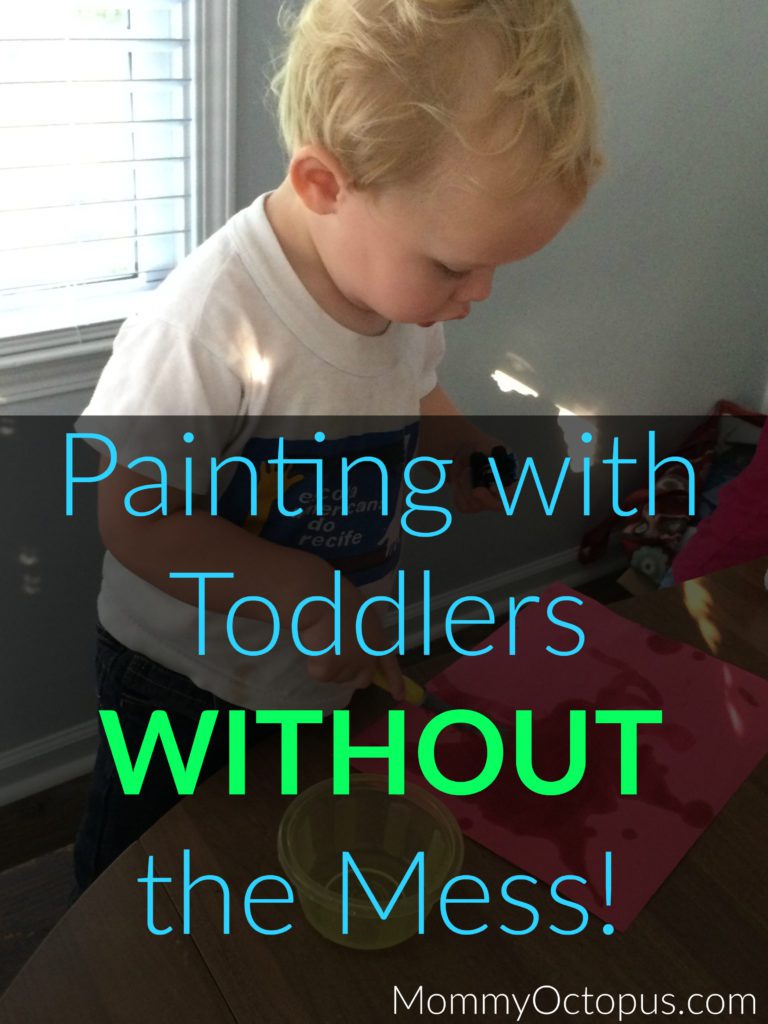
First you need a piece of colored construction paper.  Pretty much any color will do and the brand doesn’t matter.  The darker the color, the more your toddler may enjoy watching the transformation.

After you have your construction paper, also gather a paintbrush and a shallow container with just a little bit of water in it.  Know that the water will likely get spilled, so I recommend keeping the water to the bare minimum.  For my son, I used about 1/4 inch or so.

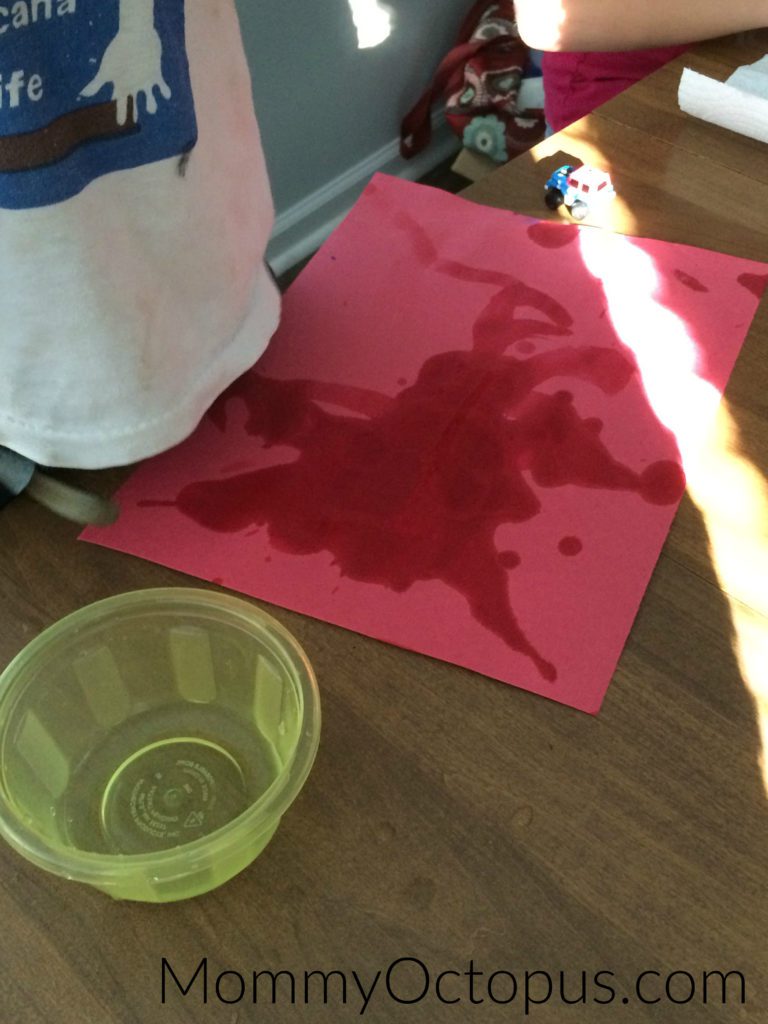
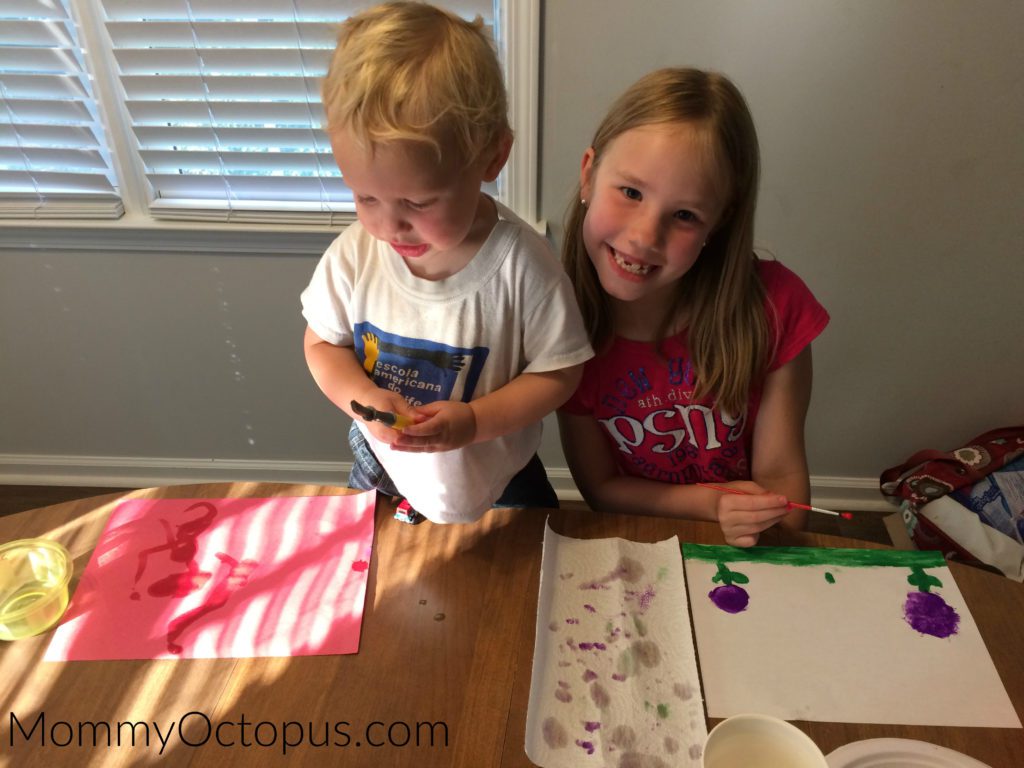
Next, let them have at it!  When the water hits the construction paper, it makes the paper a little darker!  This gives your toddler the illusion that they are “painting” without actually using paints!  It’s a win for the toddler and a win for easy cleanup!

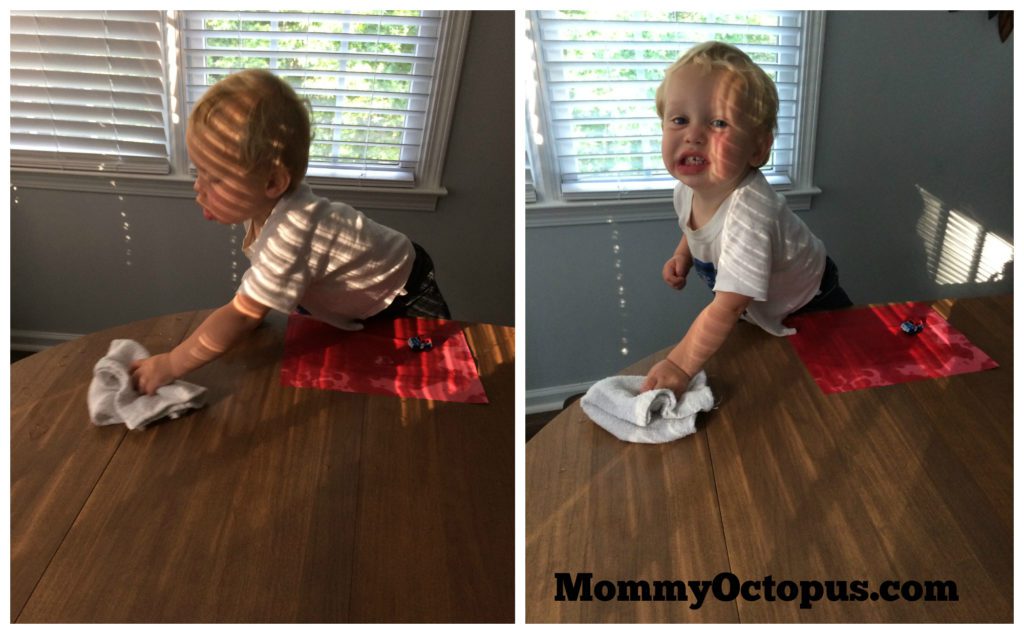
Afterward, you can even give your toddler a rag and encourage him to cleanup any spills.  Easy Peasy!  I’ve done this trick will all 5 of my kids and numerous kids that have been in our kid and they all love it!  You can set the paper outside to dry and then even reuse it a time or two.

This is how our family conquers painting with toddlers.  Do you have any other tips to add?  Leave me a comment and let me know

Sugar & Spice Turkey Handprint Artwork

November 11, 2016 By MommyOctopus Leave a Comment
By clicking my links, I may earn a small commission to support this blog. Please see our Disclosure Policy.

This is a sponsored post, written for Dixie Crystals.

sugar-and-spice-turkey-handprint-artwork

It’s feeling like fall outside and the kids were itching to do something fun!  With the North Georgia wildfires blowing smoke our way, we needed something to do that was indoors.  I took a look at the Dixie Crystals Kids in the Kitchen website and found something fun and easy to do!  As a bonus, it made our kitchen smell great!

We decided to make the Sugar & Spice Turkey Handprint Artwork, featured under their Thanksgiving Craft section.  You may already have the supplies laying around your house!

turkey-handprints

Supplies:

  • Dixie Crystals Cinnamon Sugar Shaker
  • Ground cloves
  • Ground nutmeg
  • Glue
  • Paint brush
  • Blank piece of white paper
  • Black sharpie
  • Cookie sheet

We decided to do my 1 year old’s hand print first since Daddy was on hand to help out.  I took his little hand, brushed glue on it, and then we stamped it on a piece of white paper.

turkey-hands

Before the glue dries, sprinkle it with a Dixie Crystals Cinnamon Sugar Shaker, followed by ground cloves and ground nutmeg!  Afterward, we simply shook off the excess and embellished it with a beak, eye, and legs.    Oh goodness it smells like Thanksgiving in my house!  Such wonder scents and a cute handprint keepsake.

turkey
For more fun ideas to do with your kids during the holidays, be sure to visit Dixie Crystals’ Kids in the Kitchen website.  There are recipes and crafts both available to check out.

How to Make Creepy Crawly Bug Soap

October 18, 2016 By MommyOctopus Leave a Comment
By clicking my links, I may earn a small commission to support this blog. Please see our Disclosure Policy.

This is a sponsored post, written for Dixie Crystals.

creepy-crawly-bug-soap

I’ve actually never made soap before!  It just seemed too complex.  I had no idea how simple it is to make AND how you can make it fun by adding surprises inside!

These Creepy Crawly Bug Soaps were easy to make and simple enough that the kids could help out.  We followed the Creepy Crawly Bug Soap recipe found over at Dixie Crystals’ Kids in the Kitchen website.

bug-soap-ingredients

Supplies:

  • 1 1/2 tablespoons Dixie Crystals Extra Fine Granulated Sugar
  • 1 teaspoon vitamin E oil
  • 2 teaspoons of your favorite essential oil (we used orange)
  • 16 ounces clear glycerin Melt and Pour Soap

Directions:

soap-melt

  • Cut melt-and-pour soap into cubes and place in a double boiler.
  • Cover with lid.
  • When soap is melted, remove from heat and mix in granulated sugar and vitamin E oil.

pour-soap

  • Put mixture in a glass measuring cup and stir in the essential oil.
  • Pour into soap molds until about half way full.
  • Add your favorite plastic bugs. (We found ours in the Halloween section at Target.) Remember that your mold is upside down, so put bugs in so they are facing the top of the soap when complete.
  • Top off the mold with more of the soap mixture and let set for about 4 hours.
  • Pop out of the mold and then gift or enjoy with your kids!

creepy-crawly-soap

Tips:

If you haven’t made soap before, know that it solidifies pretty quickly.  I started off by taking my time, but found out that I needed to speed things up!

We had a blast making Creepy Crawly Bug Soap!  So much that I think we will do it again for other holidays.  My kids are already eager to wash their hands so that they can score the spider inside the bug soap.

For more fun ideas to do with your kids during the holidays, be sure to visit Dixie Crystals’ Kids in the Kitchen website.  There are recipes and crafts both available to check out.

Decoupage Fabric Christmas Ornaments!

December 21, 2015 By MommyOctopus Leave a Comment
By clicking my links, I may earn a small commission to support this blog. Please see our Disclosure Policy.

Decoupage Fabric Christmas Ornaments DIY

We’ve been busy with the Kids in the Kitchen again with our friends at Dixie Crystals.  This time, we are making the Holiday Fabric Ornaments!  This was a rather simple project with minimal mess and a lovely keepsake for Christmases to come.  The kids really enjoyed making them and are hoping to make a few more as gifts.  Now that we see how simple it is, we can definitely work making more into our busy Christmas week.

Supplies: 

  • Small strips and squares of holiday themed printed material, brown muslin or burlap.
  • 1 1/2 cups flour
  • 1/2 cup Dixie Crystals Extra Fine Granulated Sugar
  • 1 teaspoon oil (grapeseed, olive, etc.)
  • 1 1/2 cups water
  • Styrofoam balls
  • Paint brush
  • Pins
  • Twine or ribbon

Dixie Crystals Decoupage Ornaments

First up, you need to make the decoupage glue. Simply mix flour, sugar, oil and water in a pot over low heat until well combined and smooth in texture to make the decoupage.  I used half of the ingredients listed and we had plenty of glue.

Decoupage Ornaments

Next, cover your styrofoam ball with a generous amount of decoupage glue.

Decoupage Ornaments for Christmas

Layer the fabric strips however you wish and allow them to overlap each other for maximum coverage.  After each strip, cover it with another layer of decoupage.  My kids found it easiest to have one of them hold the ball while the other layered the strips and glue.  The ball was easier to make when they went hands on and smoothed out all the strips and glue.

Once the styrofoam ball is completely covered, make sure there is a final coat of decoupage glue over the entire ball.

Using a few inches of ribbon and a craft pin, attach the ribbon to the styrofoam ball.  Hang somewhere to dry before adding it to your tree or gifting.  We hung ours on the back of our patio chairs.  It took a few hours to dry and then was tree-ready!

For more fun recipes and activities, visit Kids Kitchen.

Baby Footprint Christmas Trees

December 19, 2015 By MommyOctopus Leave a Comment
By clicking my links, I may earn a small commission to support this blog. Please see our Disclosure Policy.

Baby Footprint Tree

My friend Rebekah sent me the absolute cutest photo showing me what her and her little man were up to today.  They made these adorable baby footprint Christmas trees!  I am definitely going to do this with Simon!  I asked her to do a write up for you guys so you all could see!  This is a cute idea to give as a gift or make for yourself as a keepsake of your little one’s footprint!  See below:

Christmas Tree Footprint


Supplies you will need:

  • Green ink pad – make sure it is washable and non-toxic!
  • Card stock paper – I used a nice ivory color. Cut the paper down to your preferred size.
  • Red & brown paint
  • Gold calligraphy pen
  • Thin paint brushes
  • Clothespins
  • String or twine
  • Baby wipes 🙂

Christmas Tree

Steps:

1. Pick a time when your baby is happy and lying down. Have lots of wipes handy! Press the ink pad onto your baby’s foot a couple times to get a good coat of ink. Then press your card stock paper onto your baby’s foot, centering the foot where you want on the paper. Repeat as many times as you want (or baby will allow), adding more ink each time you do a print. Once you are finished, wipe all the ink off baby’s foot and tell him or her what a good job they did!

2. Now wait for your baby to go to sleep, or be happily entertained by someone else.  🙂 Using the brown paint, make a small “tree trunk” at the bottom of the footprint.

3. Next, using the red paint, make small dots to look like ornaments throughout the tree. Wait for the paint to dry. Then use the gold calligraphy pen to draw streamers of tinsel going up the tree.

4.  With the gold calligraphy pen, write whatever message you’d like above and below the tree. Make sure that you leave space to put the clothespin at the top! I made personalized ones for grandparents, great-parents, and auntie, as well as one for us with the year on it.

5. Cut a piece of string or twine, about 4-5 inches long. Make a loop with it and then use a clothespin to attach the string to the picture. Alternatively, you could just use glue to attach the string, but I thought the clothespin looked cute. The picture can hang on the tree, or be framed if you take the clothespin off. Enjoy!!

Thanksgiving Turkey Sun Catchers

November 22, 2015 By MommyOctopus Leave a Comment
By clicking my links, I may earn a small commission to support this blog. Please see our Disclosure Policy.

Thanksgiving Turkey Suncatchers

Thanksgiving is just days away and we are cleaning, prepping, and trying to keep the kids busy so they won’t mess up the house.  I was looking for some fun ideas to take up time and decorate the house and found these Thanksgiving Turkey Sun Catchers on the Dixie Crystals Kids in the Kitchen website.

After a quick trip to the dollar store to grab some tissue paper, we set right to work making our sun catchers.

Thanksgiving Suncatchers Process

For starters, I gave each child a piece of wax paper and taped it to the table so they would stay in place.  Next we made the decoupage glue.  Note that the recipe listed on their site gave us a TON of glue.  Unless you are making these for a classroom, I recommend halving or even quartering the recipe so you don’t end up with too much.

Decoupage Glue:

  • 1 1/2 cups all-purpose flour
  • 1/2 cup Dixie Crystals Extra Fine Granulated Sugar
  • 1 teaspoon vegetable oil
  • 1 1/2 cups water

Next, “paint” the glue on half of your wax paper.  Tear the tissue paper in strips and lay on the glue.  My kids had fun making their own designs with the tissue paper so that their turkeys were unique.  Once you have glued down the tissue paper on half of your wax paper, apply glue to the top of your tissue paper and fold over the rest of the wax paper on top.  Smooth it out to rid it of air bubbles.  Now set it aside to dry completely.  We did ours before nap and then put them outside to dry so we can finish after nap.

Turkey Suncatcher

Next we folded the wax paper in half and I drew the feathers so the kids could cut them out.  Then we added a body, beak, and eyes and hung them up in the window!  They look great with the light shining through!

For more great craft ideas for Thanksgiving, visit Dixie Crystals Kids in the Kitchen website.

This is a sponsored post by Dixie Crystals.  

Spooky Spider Cookies – Perfect for Halloween Parties!

August 28, 2015 By MommyOctopus Leave a Comment
By clicking my links, I may earn a small commission to support this blog. Please see our Disclosure Policy.

Spooky Spider Cookies for Halloween Parties


I just love making themed foods.  It makes a party so much more fun and gets a lot of giggles from the kids.  I am thinking that these Spooky Spider Cookies are going to be as popular as the Turkey Pretzels from last year’s Thanksgiving posts.  These cookies are so easy to make and the kids loved helping!  Easily whipped up in an afternoon.

They are so simple that even the kids can help make these cookies!


Ingredients needed:

  • Your favorite homemade cookie!  Keep it simple by using a store bought refrigerated sugar cookie or from scratch with your favorite homemade cookie recipe.  For these,  I used peanut butter refrigerated dough.
  • Reese’s Peanut Butter Cups, unwrapped
  • Candy Eyes
  • Chocolate Chips

Spider Cookies In Process

Directions: 

  • Bake cookies as directed in your recipe.
  • As soon as you pull them out of the oven use a teaspoon to make divots in the middle of the cookie.  This is where your Reese’s will go AFTER they cool.
  • Allow cookies to cool completely.
  • Prepare your drizzle for the legs by adding a small amount of chocolate chips to a bowl and microwave them in intervals of 12 seconds until they are completely melted.  Stir after each time you microwave until it’s nice and smooth.
  • Place Your Reese’s in the middle of the cookie
  • Take your candy eyes and place a dab of melted chocolate on the back and stick to the side of the Reese’s
  • Use your chocolate drizzle to make spiders legs on the cookie – I used the smallest tip on my Wilton cake decorating set and it worked great!

Store in an airtight container or use right away.  Perfect to take for all the fall parties!  Enjoy!

Melted Snowman Christmas Ornament with Dixie Crystals

December 9, 2014 By MommyOctopus Leave a Comment
By clicking my links, I may earn a small commission to support this blog. Please see our Disclosure Policy.

Melted Snowman Ornament


We’ve had so much fun making ornaments this year.  We made blue line ornaments for my husband’s shift and then was looking for more homemade ornament ideas.  I was browsing on the Dixie Crystal’s Kid’s Kitchen website and came across these adorable melted snowman ornaments!  Since we live in Georgia, snow isn’t an often occurrence, so I thought these were pretty funny!  They would also be great for a Frozen fan, decorated as a melted Olaf.

The kids and I ran to the store and grabbed some clear ornaments so we could get started on these.

Snowman Ornaments

To make, simply pour Dixie Crystals sugar in a funnel to fill up the ornament about 1/3 of the way.  If you don’t have a funnel, just fold a piece of paper into a funnel shape and pour through the paper into the ornament.  Then add in 2 tiny twig pieces, eyes, nose, ribbon, and you’re done!  The Dixie Crystals website recommends using fondant for the eyes and nose, but we used construction paper.

They were really easy to make and perfect for gifting!

Melted Olaf Snowman Ornaments

For more fun recipes and activities, visit Kids Kitchen.

This is a sponsored post, written for Dixie Crystals.

Thin Blue Line Christmas Ornaments

December 3, 2014 By MommyOctopus 2 Comments
By clicking my links, I may earn a small commission to support this blog. Please see our Disclosure Policy.

Thin Blue Line Christmas Ornament for Law Enforcement Officers

I typically put together goodie bags for my hubby’s shift at Christmastime and this year I was trying to figure out what to make.  I finally decided to make homemade ornaments!  They were quite simple!

I found the black ornaments at Hobby Lobby for $6.99 for a pack of 6.  At the time, they had 50% off Christmas decorations, so I got them for just $3.50 per pack and I bought 3 packs.  You can always check the Hobby Lobby website for a coupon as well.  The ribbon was $1.99 and I used the 1/4″ in King Blue.  So for $12.49, I took care of all of his shift!  Woo hoo!

(Side note!  If you are reading this and have a loved one on my hubby’s shift, please act surprised!)

Thin Blue Line Ornaments

To attach, I used a hot glue gun.  You’ll want to make sure the glue gun is nice and hot before you start.  Go a few inches at a time, applying glue and then pressing the ribbon on top.  I found that it worked better using less glue so it didn’t squirt out the sides of the ribbon.

Once done, you could use glitter glue to write 2014 on them or add any other embellishments that you like or just keep it simple.  You could also switch it up with a red ribbon for firefighters.  Enjoy!

thin blue line christmas ornament

Homemade Laundry Detergent Recipe

September 17, 2014 By MommyOctopus 4 Comments
By clicking my links, I may earn a small commission to support this blog. Please see our Disclosure Policy.

Homemade Laundry Detergent


It’s that time again for my family.  Time to make more laundry detergent!  With a family of 6, we have lots of clothing that needs to be washed.  I’ve been able to save money by making my own laundry detergent the past couple years.  Its super easy to do as well!

  • 1- 4lb 12 oz box of 20 Mule Team Borax
  • 1 – 4 lb box of Arm And Hammer Baking Soda
  • 1 – 3 lb 7 oz box of Arm and Hammer Super Washing Soda
  • 1 – 3lb container Oxy-Clean
  • 4 – bars Fels Naptha Soap, grated
  • 1 – large bottle of Purex Crystals in your favorite scent

Simply combine all ingredients in large rubbermaid container and combine together.  Mix well to ensure that everything is combined.  Use 2-3 tablespoons per wash for a non-HE washer or 1 tablespoon for HE!

  • 1
  • 2
  • Next Page »

Catch up with Mommy Octopus

Follow Me on Pinterest

Subscribe

Enter your email address:

Delivered by FeedBurner

Categories

Timberdoodle"

Grab My Button


Schoolhouse Review Crew

Privacy Policy | Disclosure

Copyright © 2023 · Modern Blogger Pro On Genesis Framework · WordPress · Log in

We are using cookies to give you the best experience on our website.

You can find out more about which cookies we are using or switch them off in .

Mommy Octopus
Powered by  GDPR Cookie Compliance
Privacy Overview

This website uses cookies so that we can provide you with the best user experience possible. Cookie information is stored in your browser and performs functions such as recognising you when you return to our website and helping our team to understand which sections of the website you find most interesting and useful.

Strictly Necessary Cookies

Strictly Necessary Cookie should be enabled at all times so that we can save your preferences for cookie settings.

If you disable this cookie, we will not be able to save your preferences. This means that every time you visit this website you will need to enable or disable cookies again.